Email Filters in cPanel


How To Setup Email Filters in cPanel

If you pay attention to this tutorial, you will learn how to set email filters in cPanel. Many of you may not know what a cPanel is, so let us learn a little bit about cPanel first. Firstly, cPanel is quite an exciting software that allows users to utilise sophisticated and automated tools that permit any user to conduct smooth business operations using the internet. cPanel is a software often used to manage servers and monitor other factors related to any website.

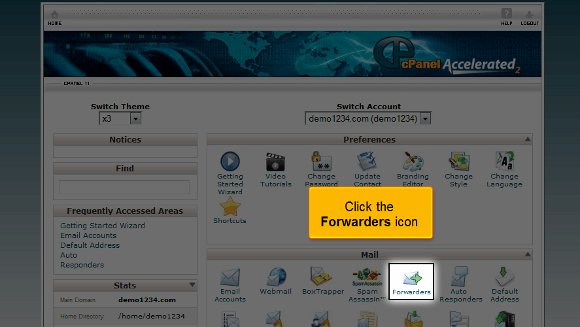
Since you are looking at a tutorial that deals with the setup of email filters in cPanel, it can be assumed that you already know how to log in to the application.

1) First, you have to click an icon that says account level filtering

email filter

2) After you have done the above, you have to now click on an option that says Create a new filter

new mail filter

3) You have to put in a name for the filter that you have created

mail filter rule

4) You also have to mention a specific rule here

email filter

5) Afterwards, you must go for an option that says the To field contains the text, which should be the folder name. So, this particular action will ensure that the email is delivered to the folder mentioned above with a designated term.

email filter

6) Lastly, you click on the tab that says create

email filter
email filter

So now you have been successful in creating a filter. From this point, you will have the liberty to edit all the existing filters. This is where the tutorial ends, and now you have the knowledge to help you set up email filters in cPanel.

You can now go back to your cPanel interface and check the settings. In fact, you should take some time to study the other tabs relating to the filter feature on your cPanel. Now you must know how to log out; okay, this is easy. You just have to look for the logout tab, which should be at the top of the page. You should not have too much trouble understanding the tips mentioned in this tutorial, and by

now, you have also noticed that there are no technicalities involved in the whole thing, just a few easy steps for you to follow. You simply need to have a cool head and a little patience. You shouldn’t rush the learning phase. Go over each point until you have the whole thing worked out. You may find something complicated as a beginner, so do not get agitated or stressed out. Things will fall into place eventually. So relax and try to get a grip on things, which will help you in the long run. You may also feel free to look at other tutorials teaching how to set up email filters in cPanel. So follow the tips carefully.

How To Change cPanel Password


 How To Change cPanel Password

If you want to learn how to change your cPanel password, then you should go through the tips mentioned in this tutorial. Now, let us first introduce cPanel to those who have no idea. Well, cPanel is an efficient software that uses very sophisticated features that allow users to carry out their business activities smoothly without any problems. So you see that cPanel has become an essential component of daily activities.

1) Here are the tips you can follow to change your cPanel password.

2) by now, it is assumed that you can log into cPanel. So let’s get started.

cpanel

3) Click on the icon that says Change password.

change Password

4) You must enter your current password.

cPanel Password

5) After that, you must confirm your password by typing it again.

cPanel Password

6) After that, you must click on change your password.

chage password

So that is it with this tutorial. You can now use this to create a password to log in. Try setting an unusual password, something that only you will remember.

So now you can simply go back to your cPanel interface and check out its various features. You must also devote some time to looking at some of the other tabs provided. The most important thing you should know is how to log out from the interface; it’s not something to worry about. All you have to do is simply locate the logout tab in the top corner. So, I may have understood by now that this tutorial is not complicated to understand. You merely have to have some patience to go over certain aspects carefully. So try not to rush the learning period, as you will be able to absorb things properly. You can learn all the elements at your own pace. You need not hurry through it.

In the end, you can also take your time and look at other tutorials for tips. However, if you are using cPanel for the first time, you do not have to get worried. You can consult this tutorial that will guide you through the process, and eventually, learn how to use it properly and get good results quickly. A tutorial will always teach you how to use software correctly. cPanel is a prevalent software, and people worldwide use it for its simplicity and user-friendly interface. In fact, you can start using the software immediately after its installation process. The software facilitates almost any business operation using the internet the fastest way possible. So now that you know this software has a lot of benefits, you should start using it right away, but before you do, make sure you have gone through this tutorial very well, as it will help you in the long run.

Webmail From Within Cpanel


Webmail from Within Cpanel

So, read on if you are looking for a tutorial to teach you to use webmail from within cPanel. This tutorial will guide you through simple steps to access webmail using cPanel. However, before we get into the technical side, it is best to learn about cPanel. To begin with, cPanel is a prevalent software that lets users utilize very sophisticated features to carry out business operations smoothly. So you can understand that cPanel has occupied an essential part of our daily lives. Follow the guidelines given below to get the best results possible.

It is assumed that you know the procedure to log in to cPanel.

1) First, you must locate the icon that says Email Account. You can use this link to access the webmail within your main account. However, we will discuss an alternative method.

webmail

2) What you can do is click on the option more.

webmail

3) After that, you will find an option called Access Webmail, and you must click on that.

webmail cPanel

4) You must fill in the password for the particular email account and not the password for your cPanel.

cPanel Webmail

5) You can now click on login

webmail email

6) Now, you must click on a particular option called Horde. On this specific screen, you will see your inbox; you can even write a new message.

webmail email
webmail inbox
webmail message

7) After you are done with the webmail, you can click on Log-out.

webmail cPanel

So this is where the tutorial ends, and now you know exactly how to use webmail from within cPanel.

So, by now, you can see the interface of your cPanel, so you can get started immediately by going through the various settings. In fact, you should look at the different tabs at your own pace, as there are multiple things to learn.

Okay, the next thing you need to know is how to log out from the interface. Well, that should be a breeze; try locating a log-out tab on top of the page and click on it, and the job’s done. If you pay attention, you will notice that this tutorial

is not challenging to understand. You just need a decent level of patience to absorb things correctly. Another advice is to to try not to hurry through the learning process, as you may miss out on some essential aspects.

You may also take the time to look at some other tutorials that will teach you to use webmail from within cPanel. If you are new to using this software, you have no reason to get worried. This tutorial will guide you through the entire process step by step. In fact, you should go through the tips in this tutorial and start using cPanel right away.

Enable Spam Protection in Cpanel


How To Enable Spam Protection in Cpanel

If you are looking for a way to learn how to enable spam protection in cPanel, then you are indeed looking at the proper tutorial. Before we proceed, it would be good if you knew more about cPanel. cPanel is a helpful software that allows users to use sophisticated tools that will enable them to smoothly carry out all the operations regarding your business. So, by now, you have understood that a cPanel is very important when looking after the servers and going through the other factors related to any website.

Let us look at the steps you must follow to enable spam protection in cPanel.

1) First, locate an icon that says Box Trapper and click on it. This adds protection to your inbox from any spam. Now, the contacts not on your list will have to reply to verification mail before they can send you any mail.

spam protection

2) To ensure that the box trapper is enabled on an email, click on manage.

spam protection

3) After that, you must turn on the button.

spam protection

4) Once you have done the above, the box trapper will be enabled for the email; then you need to click on go back.

cPanel

5) The next important step is when you will have to configure the settings in the box trapper. For this, you will have to click on Configure Settings.

cPanel
spam protection

6) After that, you must click on the edit confirmation message tab. This will allow you to edit the confirmation messages.

spam protection
spam protection
spam control

7) Next, click on Ignore lists, black or edit white. This option will allow you to divide your contacts into people you want to keep in touch with or people you wish to ignore. Once you set this up, you will notice that the spam has dramatically been reduced.

cpanel protection
spam protection

8) Click “Home” to the other option for controlling spam.

spam control

9) You should also click on Spam Assassin.

cpanel

10) Click on “Enable SpamAssassin” to  Enable it.

spam control

11) Then you must also click on Go back

cpanel

12) After that, you must configure the spam assassin

spam control

With this, we have come to the very end of the tutorial. So now you have full knowledge that will enable you to enable spam protection in cPanel. You must use Spam Assassin and Box Trapper to reduce spam. Using both will give your account maximum protection by keeping spam at bay.

So now your spam protection is enabled to the fullest, and you can take the time to look around. You should also take the time to look at some of the other tabs. To learn more about the cPanel, you should have a lot of patience and not rush the learning process. In this way, you can get a better grip on this. So follow the tips in this tutorial very closely.

Mx Entry in cPanel


How To Add Mx Entry in cPanel

Now, to learn how to add an Mx entry in cPanel, you must go through this tutorial. Before we get into all of this, you must know what a cPanel is in the first place. Well, the good news is that it is not complicated at all. In fact, it is a software that is very easy to use. In fact, this software comes with specific automated tools that help users carry out their business operations quickly and without facing any technical problems. You may have understood that a cPanel is essential and helps manage servers easily.

Now, let us look at the steps that will help you to add an Mx entry in cPanel.

Now, it can be assumed that you know how to log into cPanel.

1) Firstly, you will have to locate an MX entry icon. Once you have found this icon, you have to click on it. After that, it is best to set the settings to custom, as this will also make it compatible with other servers.

00-Mx-Entry

2) After the above, you must fill in a priority number to create a fresh MX record. The most minor priority numbers will be put in first, and the highest numbers will be entered.

01-MX-priority

3) After that, you may enter the fresh MX entry

02-New-MX-entry

4) After you have completed the above steps, you will need to click on a button called Add new record.

03-add-new

So that is about all; at this point, your new MX record is added. This is where the tutorial ends.

Now, you have to go back to the cPanel interface and look at the settings correctly. You must take your own time in going through the other tabs that are present in the cPanel.

Now, you must know how to log out; that should not be so tough, as you must locate a logout button at the top of the page. By now, you may feel that this tutorial is not complicated to understand. All you need is a good amount of patience so that you can put in some effort to try and understand the

various aspects of the cPanel. You do not have to rush the learning process, as there are things that you need to absorb well. It is always advisable to have a relaxed approach to things as this will benefit you in the long run.

You may also feel free to look at other tutorials on adding an Mx entry in cPanel. If you are new to all of this, you will face failure the first couple of times, but things will work out just fine. So keep your cool and follow the tips in the tutorial, and you should face no problems using the cPanel to the fullest.

Email forwarding in cPanel


How To Do Email Forwarding in cPanel

You will find this tutorial very helpful in learning the methods used to set up email forwarding in cPanel. Before we do that, you should know a little about cPanel and what it does. Well, a cPanel is really simple; it is fantastic software with a user-friendly interface that permits users to utilize automated tools to complete their business activities smoothly. So, by now, you have understood that a cThe panel is crucial when managing servers and the various factors relating to website ownership.

This tutorial assumes that you already know how to log on to cPanel well.

Now, we will learn the various methods used during email forwarding setup in cPanel in easy steps.

1) First, you must locate the Forwarder’s symbol or icon.

00-email-forwarder

2) This function will allow you to send a specific email from one address to another. This comes in handy if you have more than one email address.

3) After this, you will need to perform an action called Add Forwarder

01-add-forwarder

4) It is here that you have to type in the email address that you want to send the message to.

02-forwarder-email
03-email-forward

5) you must click the Add Forwarder tab at the end.

04-click-add
05-successfully-add

So you see that the steps are straightforward to understand, and almost anyone can do it; you do not need technical knowledge. The email forwarder has now been configured and can be used immediately. You can always return to this page to create more forwarders or remove certain existing ones. With this, you can also make specific domain email forwarders. This is where the tutorial ends; you are now equipped with all the knowledge on the various methods used during the setup of email forwarding in cPanel. Now, you can access your email from the interface and check your settings. You start off by parking multiple domains and setting up your emails. To better understand things, you should take a lot of time going through the various settings on your mail.

Okay, now you should also learn how to log out of the email; that should not be so tough. You simply have to locate the logout tab at the top of the page, click on it, and log out. By now, you may have understood that this tutorial is not too tricky to know if you pay attention to the tips. You just have to have a certain amount of patience to try and understand what cPanel is. You can take your time, and you do not have to rush the process. It is best to slow down things while you are learning. It will help you get a better grip on things. You are also free to consult other tutorials that will teach you the various methods used during email forwarding setup in cPanel. If things do not go smoothly for the first couple of times, do not get worried. Simply follow the tips in the tutorial.

Set Your Default Address in cPanel


How TO Set Your Default Address in cPanel

If you are looking for tips to follow while setting your default address in cPanel, you are certainly in the right place. Before we get into information to help you develop your default address in cPanel, let us learn what a cPanel is. This interface facilitates automated tools that allow a user, reseller, or administrator to carry out their business operations smoothly. So, you see that a C panel’s primary function is to help manage the servers and oversee the other aspects of the website.

Here are the tips that you can follow the information that will help you set your default address in cPanel

1) To begin with, you can log in and need to click on the icon that says Default Address. This is the place where you have to configure a default address. So all those un-routed emails and the emails you send will be stored here. For example,, if you want your emails to go to an account you will be using, simply set that account as your default.

cpanel Default Address in cPanel
00-deafult-Address

2) After you have selected the default address, you must click on the option Forward to email address

02-Forward-Email

3) After that, you must type in the email address that you want as your default address.

03-Enter-Address

4) After typing in the email address, you can click on change and set your default address. This is when you will see that the default address has been placed. The new default address can be seen on the interface.

04-Change
05-successfully-change

So, this is the end of the list of tips you need to follow on setting your default address in cPanel.

Well, you see that there is nothing to it; you can access the default address and start work immediately. You can go through the various settings on your emails and even send a test email to check the settings. You should review all the multiple features in your cPanel regarding the email setup.

Now, you must know how to log out from the cPanel email; the log-out tab is usually at the top of the page. So you see that in most cases, it is not too difficult to understand the tips that will help you set your default address in cPanel. You just need a certain level of patience to simply understand the software and its functions. You do not need to rush the process since you may not get accustomed to it quickly. You can take things at your own pace. This way, you will learn about tips that will help you set your default address in cPanel without facing much trouble. You can also take the time to look around at various other tutorials that teach you tips that will help you set your default address in cPanel. Follow the directions carefully; you will not have trouble setting up your default address.

cPanel Auto Responder


How To Use cPanel Auto Responder

So, if you are looking for a tutorial on how to set up cPanel Auto Responder, you have stumbled upon the right article. Before moving into the technicalities, let us learn about the cPanel. cPanel is a handy software that allows users to utilize automated tools to run business operations smoothly. So you see that a cPanel plays an essential part in managing servers and even looking after certain factors relating to the website.

cPanel Auto Responder: It is assumed that you already know how to log in to the cPanel.

1) Start by clicking on the icon that says cPanel Auto Responder. Using this option, you can create autoresponders that can be used; these can send emails on your behalf to those who send you mail. This particular function is really great.

cPanel Auto Responder

2) After clicking the cPanel Auto Responder icon, click the Add Auto Responder button. In most cases, you will have to set the character to utf-8.

01-add-responder

3) After that, you must enter an email address to set an autoresponder.

02-Chr-set
03-responder-email

4) You will then be required to fill in the entries for the subject and From fields in your email.

04-from-sub-field

5) You will then have to type in your message in this option

05-Message-box

6) After entering your message, you have to click on the option that says Create/ Modify.

06-res-create

Follow the tips, and that is it. Your cPanel Auto Responder will be created within a very short time.

So let us say that if someone sends you an email to your email address, the email saying out of office will automatically be sent to their email address.

So now we have come to the end of the tutorial, and you know how to set up cPanel Auto Responder.

Now, you can return to your cPanel’s interface and check out your email’s various features. In fact, it will be better if you take some time to review some of the other tabs in your cPanel.

Now, you must also know how to log out of your email; you will see a tab at the top of the page called log out. Well, you can be assured that there is a tutorial on How to set up cPanel Auto Responder. You just need a little patience to try and understand the various aspects of the software. You do not need to rush the process, as you may not grasp all of it the first time. In fact, you can feel free to take a sufficient amount of time to learn how to set up an auto-responder in cPanel. You may feel free to look at some of the other tutorials that teach you how to set up an auto-responder in cPanel.

Follow the guidelines in the article, and you shall have no trouble using this feature in the cPanel.

01-add-responder

The best ways to Create a POP Email Account in cPanel


How To Create POP email account in cPanel

Finding a way to create a POP email account in cPanel may not be easy for a novice. However, getting going with your POP email account is not difficult. Some may want to know what it is before they even start operating it. Of course, this may look difficult to beginners, but this tutorial will make it a cakewalk for you in no time. Read on to learn more about the POP email account in your cPanel.

A POP or Post Office Protocol is an application which is a layer of Internet standard protocol. This is mainly used to retrieve emails from remote servers in general. Again, the Internet Message Access Protocol or IMAP and POP are the most popular ways of retrieving emails. This is why most of the webmail service providers also make use of either of these applications.

Here are the steps to follow when you try to create a POP email account in cPanel:

1) First, you must log into your cPanel account.

cpanel POP Email Account

2) Then click on the icon that reads “Email account.”

cPanel Email account

3) Clicking on this icon will take you to another page that asks for your email registration. This usually reads as only “Email”; enter any name to set your email ID.

Cpanel New Email

4) Below this, you can see a box advising you to enter a password. Make sure that the password is of more than five letters. Ideally speaking, you should choose an alphanumeric password.

5) The following box will prompt you to type in your password again for a match.

Cpanel confirm Password

6) Also, you can check your password’s good by clicking on the “Password Generator” button if your interface has one.

Cpanel Password ganerator

7) Right down under this box, you may see what is known as the “Quota” box, which is used to put a limit on your email account. If you have a number on your mind, feel free to express it!

Cpanel Mailbox Quota

8) Finally, click on the “Create Account” tab, as this will immediately create your much-desired POPmail account.

cPanel Create Account
cPanel Email Created

9) After this, you can scroll down only to see that you can change your password, quota, delete, or make any necessary changes to your email and administer them simultaneously without much of a problem.

cPanel Change Email & Quota

Hence, it must be mentioned that creating a Pop email account in cPanel is undoubtedly not that difficult, but the problem lies with one’s expertise. Once you know it, there is no need to worry as you will get used to it soon. In fact, the tutorial mentioned above will give you the confidence to log into your Popmail account without much difficulty. So what are you waiting for? Go ahead and try it right away!

The advantages of a Best Hosting Provider


The internet has undoubtedly become an essential part of our lives. In fact it has become an important tool that facilitates most of our daily activities. Without it we would feel like a child without parents. Companies all over world have realized that the internet has a lot of potential and can produce great results if utilized properly at the right time. Business houses both big and small are now paying a lot of emphasis in promoting their own website. Companies have discovered that the only way to connect to a bigger market is by hosting a website.

Now there is no harm if you want to hire the services of a web hosting service provider; however you should remember that there are many such service providers in the market and not all of them provide genuine services so you really have to be careful about the web hosting service hat you hire. You start out by looking up names on the internet; make a list of the companies that you want to work with. Compare the prices and services that they have to offer and then you can sign up with the company. It would also be wise to view the video testimonials of the customers as it will give a good idea on the kind of services that the company has to offer.

You can enjoy many benefits from hiring the best web hosting services. The main advantage is that you expect a good uptime for your website. This is very important as a website with technical problems is never appreciated by the general public. If your website remains down for most of the time then your website will not be able to generate any traffic and you will lose customers.

The best web hosting service provider may be a little expensive but in the long run it does have many advantages. By hiring a good company you will get adequate disk space. The disk space that is provided can be utilized for uploading files, images and videos. However if your website is less interactive and does not use multimedia components then you do have to use a big disk space. You can also expect to get very good bandwidth from the best hosting provider. With a good bandwidth you can now store a lot of data but for this you may be required to pay a little extra. However when you select the best hosting provider it will not punch a hole in your heart.

When you select a good company you will not face the challenge of upgrading your services as the service provider will keep you informed of the various updates that are available. The service provider also puts together customized packages and the good part is that you only pay for what you use. These customized packages are just perfect for companies that have different requirements.