Setup Domain redirects in cPanel


How To Setup Domain Redirects in cPanel

While trying to learn something technical, it is always better to take the help of a tutorial that guides you through a process with clear instructions. Now, speaking of tutorials, this article could be a good tutorial that will help you set up domain redirects in cPanel. Before we get into the technicalities of it all, you should know something about cPanel, especially if you are new.

cPanel is a beautiful software with automated tools that allow the smooth execution of business activities. The devices respond rapidly to any command. People use the various features of the cPanel to manage their servers.

Now, here are the easy steps on how you can set up domain redirects in cPanel.

The tutorial assumes that you already know how to log in to cPanel.

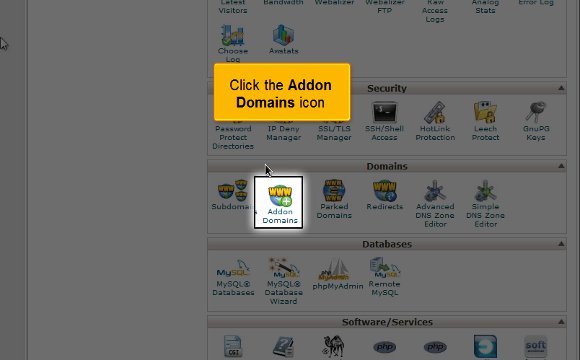
1) First, you must locate the redirects icon and click on it.

setup domain redirects in cPanel

2) Then, you can state whether you want this redirect option to be permanent or temporary.

Domain redirect

3) After that, you must enter the URL you wish to redirect.

Domain redirect

4) The most crucial part is entering the URL to which you want to be redirected.

Domain redirect

5) Lastly, simply click on Add. So you see, it is pretty simple, provided you have taken care of the above.

Domain redirect

6) Now, you may click on the go back; here, you can view the list of the domains; you can manage them or even delete some of them from the list.

Domain redirect
Domain redirect

This is where the tutorial ends, and you already know how to set up domain redirects in cPanel.

So now you can return to the user-friendly interface of cPanel and start by looking at some of the features such as the shopping carts, multiple domains, and the various email settings and going over the databases. However, when going through such features, you must take the time to absorb every part of the software. By now, it may have dawned upon you that understanding the points mentioned in the article is not challenging. So, when learning about the various features, you must not rush the process as some may be technical; try to pay close attention. You should know at your own pace; a relaxed approach is the best way to do such things. This will help you in all forms.

Now, if you are a newcomer to cPanel, then you should know that there are certain things that you should know that initially, things are not going to go your way, but that is not a sign for you to get agitated or feel like giving up; just have some patience and things will work out fine. Follow the tips in the tutorial very closely to get the whole process right without facing any problems.

MySQL database in cPanel


How To Create a MYSQL Database in cPanel

If you want to create a MYSQL database in cPanel, follow the tips mentioned in this tutorial, as they will immensely help you in the long run. Many of you may be new to cPanel, so it is better to be acquainted with the software before getting into the technical aspects. cPanel is a handy software that has very sophisticated tools. These tools allow the users to complete any business activity smoothly without any hitch. With these tools, you can manage your servers without facing any problems.

When reading this tutorial, it can be safely assumed that you already know how to log in to the cPanel. Let us now look at the steps that will help you create a MySQL database in cPanel

1) You must start by locating an icon that says MySQL database wizard. Once you locate this icon, click on it.

mysql in cPanel

2) Then you must enter a specific name for a new database

mysql in cPanel

3) Click on the next step button

mysql in cPanel

4) This step will make you create an ID for a user and fill out a username in this step.

mysql in cPanel

5) You have to press enter, and then you have to type in a password for confirmation.

mysql in cPanel

6) After you have taken care of the above, you must click on the Create User button

mysql in cPanel

7) This step is where you can assign privileges to a user

mysql in cPanel

8) To finish off, you must click on the next step button

mysql in cPanel

Once you have taken care of the above eight steps, you have successfully created a MySQL database in cPanel. So now you can simply go back to your interface, look at the other features, and even configure specific settings. There is a lot on the interface you can use, so take the time to review them.

If you pay close attention, you will see that this tutorial is not challenging to understand. You need to have a decent level of patience to understand what your software is all about. During the learning period, try not to rush things, as you may miss out on some of the most critical aspects of the software. Items will not be accessible initially, but eventually, you will get used to it. So, it is best to have a relaxed approach while learning about this software, as you can learn something effectively. You can consult other tutorials to get a good idea if you want. If you are a new user, you may take some time to get accustomed to things, so do not get worked up or disheartened. Follow the tips in the article very closely, and you shall have no problems creating a MySQL database in cPanel.

Park a domain in cPanel


How To Park a Domain in Cpanel

Learning to park a domain in cPanel is not tricky, provided you have an excellent tutorial to guide you through the process. If you are reading this, you are in luck, as this tutorial will help you understand all the aspects. Before we forge ahead, we should learn a thing or two about cPanel. cPanel is a handy software with some of the best tools to make any business operation a breeze. So, as a user, you will face no problem managing all your servers.

Now let us look at the steps to park a domain in cPanel

1) First, you must locate an icon that says Parked domains and click on it. This option is handy when you have more than one Domain for your website; this will permit people to access your website from any part.

Park Domain
Park Domain

2) After that, you must fill in the domain name you wish to include and finish by clicking Add Domain. However, you must note that you have to configure the new Domain similarly to the mother domain, or you may be unable to redirect. This step will also allow you to see the various parked domains. You also have the option of deleting or managing the parked domains.

Park Domain
Park Domain

With this, we come to the end of this particular tutorial. Now, you can go back to the interface of your cPanel. Here, you can look at the settings of the shopping carts, emails, databases, or even the various domains. To get a grip on things correctly, you must take the time to absorb other items in the panel.

The tips mentioned in the article are not challenging to follow at all. In fact, if you have a little patience, you can understand all the aspects properly. Things may not be accessible initially, but eventually, they will all fall into place. So you see that it is essential that you relax to understand things better. A relaxed approach will indeed have better results in the long run. You are free to consult other tutorials to get a better idea. If you are new to cPanel and its features,

there is no reason you should get worried; you just need to learn things gradually, and slowly, you will get the hang of things. You always have this tutorial to learn to park a domain in cPanel. Now, during the learning phase, it is best to not rush things as you may miss out on many things. To log out of the interface, all you have to do is click the logout option. Follow the guidelines in the articles, and you should have no trouble.

Create an addon domain in cPanel


How To Create an Addona Domain in Cpanel

If you want to create an addon domain in cPanel, follow a series of steps. This article will serve as a tutorial to guide you through the process. Before going ahead, it will be better to have a little introduction to this beautiful and helpful software. cPanel is a prevalent software with a user-friendly interface loaded with advanced tools that facilitate smooth business functions. The primary process of this software is to help you manage your servers.

Now, let us look at the steps that will allow you to create an addon domain in cPanel without facing any difficulties.

1) You have to begin by selecting an Addon domain icon and simply click on it. You will then be taken to a page where you can configure multiple domains for your account.

addon-00

2) The third step will require you to type in a new domain name

addon-02

3) After that, you will have to enter a username for your Domain

addon-03

4) Press enter and the Domain will have to confirm your password by retyping it

addon-04

5) You can finish off by clicking on Add Domain

addon-06

After the fifth step, Domainan, be assured that the addon domain has been created; now, you can see a list of all the parts. With this, you have reached the end of the tutorial.

So now you can go back to the interface and check out the other settings. You can take the time to go through the tabs on the particular cPanel. Since you already know how to log in, logging out should not be very tough. You must locate the log-out charge at the top of the page. The points in this tutorial are not challenging to follow under any circumstances; you simply have to take the time and follow the tips. During the learning phase, you should not rush into things as you can learn much about the software that will benefit you in the long run. So you should take the time and get to know every aspect of the software. So it is best to remain relaxed and try to get a grip on things, as this will significantly help you.

You may also feel free to consult any other tutorial, but whichever tutorial you follow, you must stick to the advice given in the article. You do not need to get agitated if you are a newcomer while using this software. You may initially find it a little tricky to use, but eventually, you will get used to the whole thing quickly. Start using cPanel today without hesitation, but before you do, follow the tips in the article very closely to get the best results quickly.

Creating a Subdomain in Cpanel


How To Create a Subdomain in Cpanel

If you have had no success locating a tutorial that will help you create a subdomain in cPanel, you are indeed lucky now. This article will be a tutorial to teach how to create a subdomain in cPanel. Well, for those of you who may not be very familiar with cPanel, this is a handy software with automated tools that facilitate smooth business operations via the internet. The primary function of cPanel is to help manage the servers.

So, it can be assumed that you already know how to log in to cPanel without difficulty. Okay, let us go over the steps that will teach you to create a subdomain in cPanel.

1) To begin, locate an icon that says Sub Domains. Once you have found this, you have to click on it.

subdomain-00

2) After that, you will be required to enter the prefix of the subdomain that you wish to create

subdomain-01

3) You must select the domain name you wish to associate your subdomain with. After doing this, you will see that a directory name, the same as the subdomain prefix, will appear automatically, but you can change the word if you like.

subdomain-02
subdomain-04

4) After you feel that you are ready, you must press create and create your subdomain.

subdomain-05

Once you have completed the last step, it means that you have reached the end of the tutorial, and you can create a subdomain in cPanel So now you have to simply go to the interface of the cPanel, and you can begin work with the various features of the cPanel. You can start working with the emails and multiple domains and configure your emails.

Logging out from the cPanel is not so tough after all; you simply have to locate the logout button on the top end of the page. The tips mentioned in the article should not be very tough to follow. In fact, if you take the time and follow the directions, you will not have any problems. You simply have to have a little patience to understand the software. You should not rush the learning process as you can learn tons during this phase. So take your time and review things until you feel you have absorbed every aspect of the software properly. So try not to get worked up; try relaxing instead, and the results will be great. Now, you can also consult other tutorials. However, if you are a newbie to this, you should really take the time to understand the software’s various features. This tutorial is just perfect if you want to learn to create a subdomain in cPanel. To get the best results, follow the tips in the article very closely, and you should have no problems.

Hotlink protection in Cpanel


How To Use Hotlink Protection in Cpanel

This article will be a tutorial to help you understand how to use Hotlink protection in cPanel. The tutorial will give you a series of easy steps to follow. Now, before we proceed, it would be better to have a bit of an introduction to cPanel. cPanel is a beautiful software loaded with sophisticated tools that make some of the most complicated operations seem like a walk in the park. This software is basically used to manage the servers properly.

So, it can be assumed that you are already logged into the cPanel interface; so now, let us look at the steps to use Hotlink protection in cPanel.

1) To start, locate the Hotlink protection icon and click on it. This will stop any other website from linking specific files, mainly image files, to your website. This feature would be good for you if you have images under copyright or want to save a little bit of bandwidth. This helps you hotlink all the photos.

hotlink-00

2) The second step will be when you will have to enter all the files that you are looking to protect.

hotlink-03

3) This option is also significant if you want to permit people to type in the URL of a file that is under protection; then you will need to enable this.

hotlink-04

4) You then have to type out a URL to which you want people to redirect if someone wants to hotlink to the images.

hotlink-06
hotlink-07

5) After you have taken care of the above, you must click on Submit, and with this, you have successfully enabled hotlink protection.

hotlink-09

6) If you want to disable the hotlink protection, simply click on the disable protection.

hotlink-11

So this is the end of the tutorial, and now you can use hotlink protection in cPanel without any difficulties.

The next most important thing you should know is how to log out from the interface, which is not challenging. All you have to do is locate a log-out button at the top of the page and click on it. The tips mentioned in this tutorial are not challenging; you must pay close attention to them to get the best results possible. You have to be patient with things as this will give you some time to understand the software and its features well. So, do not rush the process when you are learning the software. In fact, you should try to keep calm and go over the various features repeatedly to get a grasp of things.

You may also feel free to look into other tutorials as well. If you are using cPanel for the first time, you may take a little time to get familiar with things. It would be wise to consult the tips mentioned in the article to get the best results.

Additional FTP Accounts in cPanel


In essence, FTP represents “File Transfer Protocol”. File transfer protocol is managing the files related to your website. cPanel has an FTP server that is user-friendly and pre-configured already. If you own a website, your FTP access must be configured previously. You can quickly log in through FTP using your cPanel account username & password.

Also, you can systemize FTP accounts for supplementary users. Initially, you have to create a user’s account. After that, a particular user can log into your website with the help of an FTP client like Cyberduck or FileZilla. For instance, if a user attempts to log into the FTP website using a client/customer, he/she has to format the username like username@instance.com, where “instance.com” symbolizes the domain name. If you provide the login information in this fashion, your server can possess numerous FTP accounts across several websites.

How to Create Additional FTP Accounts in cPanel

To log in to your cPanel account, just enter the website ‘URL’ and add “/cpanel” at the end of the ‘URL’. Now, you will be taken to the login screen. Here, enter your web hosting username & password to access your cPanel.

The demonstration given below assumes that the user has already logged in to the cPanel and is ready to discover how to set up additional FTP accounts.

1) Once you are inside the cPanel home page, click on the FTP accounts icon that can be found under the Files section. This is the place where one can manage their FTP accounts. You will be taken to the FTP accounts page. FTP accounts let you access your website’s files through a protocol.

ftp-01

2) enter a unique login ID in the Login space to generate a new FTP account.

ftp-04

3) Now, enter a password and confirm a password one more time for the new account. Make sure that you use a secure password. A secure password should not possess dictionary words and should only contain numbers, symbols and letters. Also, remember that the passwords should have a minimum of 5 characters.

ftp-05

4) Indicate the FTP account’s home directory. The Directory field describes the peak level of your directory access that shall be fixed to your new FTP account. In the directory box, if you leave “/demouser”, then the user of this FTP account may only possess access to the “/demouser directory” and all the other folders under it. In an attempt to offer access to the user to the entire website, you have to delete all except the forward slash “/”.

ftp-08

5) The Quota field below the Directory field establishes the disk space allocated to the FTP account. You may also provide a specific quota limit on this FTP account if needed.

ftp-09

6) When you are ready, click the “Create FTP Account” button at the bottom of the page.

ftp-10

Voila! You have created a new FTP account in cPanel now. From this point, you can modify the password of your FTP account, adjust the quota level, or completely delete an account overall. So, now you know how to generate extra FTP accounts in cPanel from this tutorial.

Password Protect a directory in cPanel


Password Protect a directory in cPanel.

Password-protecting a directory limits the right of entry to specific components of your website by compelling incoming visitors to enter a valid username and a password. This password process is also known as an “Authentication” procedure.

When using this feature, steer through the directories by clicking the folder icon adjacent to the directory name. By clicking the name guide, you will choose the guide for password protection. In the same way, any other subdirectories that are inside the selected directory will also be Password-protected by this process.

Steps to Password protect a directory in cPanel.

To log in to your cPanel account, just enter the website ‘URL’ and add “/cpanel” at the end of the ‘URL’. Now, you will be taken to the login screen. Here, enter your web hosting username & password to access your cPanel.

The demo here assumes that the user has already logged in to his cPanel. So, let’s move on to Password-protecting a directory, as visitors require passwords to view web pages inside.

1) Once inside the cPanel, scroll down the page to spot the “Password Protect Directories” icon under the Security section. Click on the “Password Protect Directories” icon. A dialogue box for “Directory Selection” appears.

Password Protect a directory in cPanel

2) Pick the directory with which you want to begin and click the ‘Go’ button. Now, you will be taken to the “Password Protect Directories”.

protect-02

3) Choose the directory you wish to password-protect by clicking the name of it. In our case, we are choosing the “newfolder” directory. You will be taken to the section that’s titled “Security Settings”.

protect-03

4) Now, check the 1st check box titled “Password protect this directory”. Now, go to the “Name the protected directory” entry box and enter a name for the directory. In our case, the name “newfolder” is entered. This is the name all visitors will notice. The term can appear as anything, regardless of the directory’s name.

protect-04

5) Click the ‘Save’ button. The directory is protected; a password is needed to enter it through a browser.

protect-05

6) Since a confirmation page follows this, Click the “Go Back” button whenever you are ready. We should generate one or more users and allocate passwords to access the directory. Obviously, all users can use the same username & password. However, you may add additional users, which you can do whenever possible.

protect-07

7) Now, scroll down to the section that’s named “Create User”. In the Create User section, enter your visitors’ username to access the directory contents. In our case, the username is given as “newuser”. This new user’s name will be added to the list box under the heading “Authorized Users”, where it can be taken away later on.

protect-08

8) After that, enter the new PPassword in the space given and confirm the new PPassword once more. Pay heed to the password strength meter and always attempt to achieve a Very Strong result.

protect-09

9) Click the ‘Add/modify authorized user’ button to add the username & password. Now, the protected directory has 1 user who has access to it. A confirmation page follows, finely pointing to the username & Password you just added. Repeat the same process for all the other users you wish to grant access to.

protect-11
protect-14

10) Click on the “Go back” button now to add more users (if needed). In the PpPassword-protect directories page, you can view the active users for this directory and add or delete users from this page whenever you wish.

protect-07

Okay!! We have reached the end of the tutorial. Now, you know how to password-protect directories and assign users to passwords from this video tutorial.

cPanel Website stats


How to view your cPanel Website stats

If you are a website owner, you surely want to inspect the number of visitors who visit your website hourly, daily, or monthly. For this purpose, cPanel has many built-in statistic information tools. cPanel comes with several ‘in-house’ premeditated tools that present the customers with comprehensive statistics/summaries of the visitors. One can even view detailed statistical data about his/her website, such as total number of hits, exceptional visits, visits per page and much more, on an hourly basis with the help of these built-in tools available in the cPanel account.

Steps to view your cPanel Website stats

To log in to your cPanel account, just enter the website ‘URL’ and add “/cpanel” at the end of the ‘URL’. Now, you will be taken to the login screen. Here, enter your web hosting username & password to access your cPanel.

The demo here assumes that the user has already logged in to his cPanel. So, let’s move on to viewing the website stats.

1) Once inside the cPanel, scroll down the page to spot the “Logs” Section. Click on the “Webalizer” icon under the Logs section. You will be taken to the “Webalizer Stats”. Webalizer is a multifaceted stats program that creates a range of graphs & charts on the subject of site visitors. Webalizer is the most commonly used tool that is comprehensible. Clicking on the “Webalizer” icon will fetch a catalogue of domains available in your cPanel. You may have one or more based on the intricacy of your website.

stats-01 cPanel Website stats

2) After this, select a specific domain and click the Magnifying Glass icon (‘View’ icon) on the right side of the field where you wish to view the stats. Now, you’ll be taken to the chief Webalizer page, where you can access ‘visitor stats’ divided in several ways. The chart given on the top is always color-coded. One can view the bottom chart to understand which colour represents which stat. As a rule, the principal is the “Visits” stat shaded in Yellyellowents, which shows the number of unique visitors visiting your site in a specific month. Hence, one can analyze usage stats for a particular month as well.

stats-02

3) On the left of the bottom table, you can find a list of the months for the previous year (2012). Each link will offer you comprehensive stats for that particular month of the year. You can click on a specific month you wish to view in detail. In our case, July 2012 is selected. Now, click the “Hourly Website stats in cPanel” link at the top. Now, you can view the hourly stats for July 2012. You can also use the links at the top to steer through the wide-ranging catalogue of Website stats in cPanel. This wide-ranging list is really drawn out and contains not only statistics for the hits or Website stats in cPanel but also the breakdowns of specific files & pages which has got the majority of hits, details about the pages from which visitors have started and finished and the source of traffic for your website.

stats-03
stats-04
stats-05

4) as an alternative, you can also view the ‘Analog stats’ instead of using the Webalizer. To do so, go to the home page and click on the Analog stats in the Logs section. Now, you will be taken to the Analog Stats page. In essence, Analog is quick and lightweight data that gives a simple summary of all the visitors to your website.

stats-06

5) Click on ‘View’ to see view cPanel Website stats in cPanel sorted month-wise.

6) Now, select a specific month to view its stats. In our case, July 2012 is set. You will immediately be taken to the “Web Server Statistics” page. One can view the usage stats in several dissimilar ways from here.

Website stats in cPanel
cPanel Website stats

7) Click on the “Daily Summary” button to view the cPanel Website stats summary daily

stats-08

8) Another alternative is to download the “Raw Access Logs”. Go to the home page and click “Raw Access Logs” under the Logs section. Raw Access Logs help you observe the summary of visitors without providing charts, graphs or any other graphics. You can scrutinize the usage data with your personal data analysis application if you download these logs.

stats-09

9) Now, click on the domain to begin the cPanel Website stats download process. A dialogue box will be opened now.

stats-10

10) Click the “Save File” option and the the “‘OK”‘ button. All done! The cPanel Website states that data has been saved to the computer.

stats-11

We have reached the end of the tutorial at this point. So, you have learned how to access your cPanel Website status and download how to access logs for further study.

Disk Space Usage tool in cPanel


Fundamentally, the cPanel Disk Space Usage tool records all the directories and subdirectories in your home directory. This particular feature showcases how to use your disk space. Also, it can rally around in managing your disk space quota by representing files & directories that utilize vast quantities of hard disk space. In fact, you may be able to click any of the listed directories on your computer to open the related subdirectory in the ”File Manager” feature of cPanel. This tool gives you a detailed outlook of disk usage data about separate files & directories within the subdirectory. However, the Disk Space Usage tool of cPanel will not show the disk usage data for individual files in your home directory.

The Disk Space Usage tool of cPanel also exhibits disk space usage outlines for the following:

  1. Files that are in your home directory
  2. Files that are concealed inside the subdirectories
  3. Mailing catalogs in the Mailman
  4. Files that are not present in your home directory

Owing to the characteristics of storing all of the files electronically, most files take up vaguely more disk space than their original size. For instance, a file of 300 bytes may take up 4 kB of genuine disk space. Consequently, you may discover some inconsistencies between the Disk Space Usage feature and data in the cPanel File Manager element. The Disk space usage data in this feature does not point out the amount of space used by the directory. On the other hand, it just showcases the disk usage data concerning the content. In general, manuals themselves take up an insignificant amount of disk space. Also, note that the figures contained in the Disk Space Usage tool will not reveal any latest modifications that are done in you’reyou’rethe disk space of your account.

Steps to use the cPanel Disk space tool:

The following demo has been presented by considering that the user had already logged in to the cPanel. So, let’s’ move on to how to use the Disk Space Usage tool in cPanel.

1) Click the “”Disk Space Usage”” icon under the Files section. You will be taken to the “”Disk Usage Space”” page, where you can distinguish the amount of storage space (or disk space) that has been used by each directory (folder) & sub-directory in your account. Also, you can find a collapsible list of directories (folders) at the bottom of the “”Disk Usage Space”” page.

disk-usage-00 Disk Space Usage tool

2) Click on a ‘+’ sign of any folder. In our case, the ”+” sign of the ”public_html” directory is clicked. When you click, the directory of ”public_html” will be expanded. Now, you can see all the files & folders inside the ”public_html” directory.

disk-usage-03

3) Now, click on the directory (or folder name). In our case, the ”public_html” is related. You will be taken to the “”File manager”” of cPanel now. The actual contents of ”public_html” will be observed here.

disk-usage-05

4) Also, one can choose to arrange or sort out the directories in the “”Disk Usage Space”” page by specific name or disk usage. In our case, the “”disk usage”” option is selected.

disk-usage-06

Great!! We have arrived at the final stage of this tutorial. Now, you know how to use the cPanel Disk Space Usage tool to distinguish the exact spots where your files have been stored on your computer.