Typo3


How to install Typo3

People have often stated that Typo3 is a complicated application to use and install; the good news is that none is genuine. The application is straightforward to install and relatively user-friendly. Typo3 is a beautiful application by Fantastico, a reliable web hosting service provider.

The applications provided by Fantastico are beneficial and can help you do a host of things. The applications have very advanced tools and features. All the applications can be used with cPanel. Fantastico provides us with a good stock of scripts that allow for the easy and smooth installation of the applications. So, if you are looking for a tutorial that will teach you to install Typo3, then you are in luck, as this tutorial is designed to guide you through the entire installation period.

So, now let us look at the series of steps that you need to follow to install Typo3 on your computer.

1. You have to start by clicking on Typo3.

typo3

2. Once you have clicked on Typo3, you will be taken to an installation page where you have to click on the new installation.

typo3

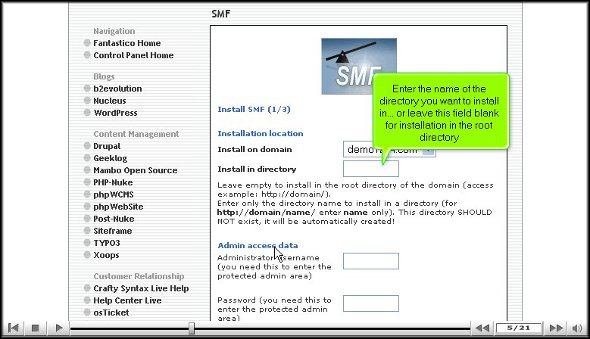
3. After That, you will be directed to yet another page where you must specify the directory in which you would like to install

typo3

4. On the same page, you will also have to specify the name of an administrator, and you must also provide a password.

typo3

5. After that, scroll to the bottom of the page and click Install Typo3.

typo3

6. To round up the installation process, click finish.

typo3

So now we have reached the end of the tutorial, and if you have followed the above steps correctly, you have successfully installed Typo3 the right way.

To better understand the application, you must go through the various tools and features, as this will help you better understand the application. To absorb the simple multiplication functions, you must not rush through the learning process; you may miss out on some crucial aspects of the application.

As a new user, you will have difficulty getting used to the application’s functions. However, you may consult other tutorials to teach you how to use the tools properly. You should keep calm and go over the various parts again and again.

Once you are confident that you can handle the application, you can start configuring the application as per your requirements. After the configuration, you can log into the application and use it.

So, by now, you have probably understood that Typo3 is quite a helpful application. To get the best out of it, you must follow the steps so that you may be able to install it on your computer.

Go to the top of the page. Back to the tutorial

WebCalender


Easy installation of WebCalender

To install WebCalender, you need to follow proper steps, and this tutorial is designed to present to you the steps you need to follow if you want to install WebCalender on your computer.

WebCalender is a handy application provided by Fantastico. This application has advanced tools and useful features that allow you to perform many activities. Fantastico is a reputed web hosting service provider that has been operating for many years now. This service provider gives its users a host of applications compatible with c Panel; the applications are also straightforward to install and have user-friendly interfaces. Fantastico lets the users access its stock of scripts; these scripts help the users install the applications quickly.

Now, let us go over the steps that you will be required to follow to install Web Calendar on your computer.

1. Now, when going through the interface of Fantastico, you must locate a tab that says Web Calendar; you must click on this to be taken to an installation screen.

webcalendar

2. you must click on the new installation on the screen.

WebCalender

3. After this, you will be directed to yet another screen where you will have to provide a directory’s name, and on the very same screen, you will have to give a username for the admin and password so that you can log in to the application.

WebCalender

4. The next step would be to provide the full name for the administrator’s Username and Password.

WebCalender

5. At the bottom of the screen, you must click on Install WebCalender

WebCalender

6. To complete the process, you must click on finish.

WebCalender

This brings us to the end of the tutorial; now, you can log into the application and go through the present features and tools. Reviewing the various tools until you have absorbed everything would be best. You should not rush the process, as you miss certain essential things.

It is no secret that as a first-timer, it may be a bit of a challenge to understand the use of the tools provided in the application. So do not get worked up if you fail to understand certain things; you can feel free to take the help of other tutorials to learn about the various features and their uses. Since this application has a user-friendly interface, you will not have much trouble understanding how to use it.

After you have managed to understand the usage of each tool of the application, you can then start configuring the features as per your purpose. So, you see that this application has many benefits and can vastly improve the operations of your website. So, to get the best out of the application, you must install it correctly.

So, follow the guidelines mentioned in this tutorial to get the installation process right.

Go to the top of the page. Back to the tutorial

TikiWiki


How To Install TikiWiki without facing any problems

Now, TikiWiki is not a very difficult application to install on the computer. All you have to do is follow the steps mentioned in the tutorial, and you will face no problem. TikiWiki is a beautiful application by Fantastico, a reliable web hosting service provider.

All the applications provided by Fantastic are straightforward to use and handle. These applications are pretty compatible with cPanel. Fantastico provides handy scripts that make the application process easy and less time-consuming.

Let us look at the steps you must follow while installing TikiWiki on your computer. Since you are going through this tutorial, you already know how to use Fantastico’s interface.

1. To start the process, you will have to click on TikiWiki

tikiwiki

2. Once you have clicked on this tab, you will be taken to an installation screen and have to click “new installation.”

tikiwiki

3. After that, you will be taken to another screen where you must type in the name of the directory where you wish to install TikiWiki.

tikiwiki

4. After completing the above, you can click install TikiWiki.

tikiwiki

5. To complete the installation process, you must click on finish.

tikiwiki

With this, we have reached the end of the tutorial. Now, you can use the admin name and password to log into your account. This application has many features and tools that can let you perform various activities. It would be best to go through the application interface to learn how to use it well. It would be wise not to rush through the installation process as you will miss out on the essential aspects of the application. You may consult some other tutorials to learn about the various tools and their usage,

If you happen to be a new user, you may find it a little tricky to go about the interface, but once you spend a little time, things will work out just fine. Together, you will need to have a lot of patience and stay calm. The best part about this application is that you can tweak certain features as per your requirements, so once you are confident about it, you can start configuring the settings. Once you start using this application, you will notice a drastic change in the performance of your website within a short period.

So you understand that TikiWiki is a handy application provided by Fantastico, so to bring out the best from the application, it has to be installed correctly. So, ensure you do exactly as mentioned in the tutorial to complete the process correctly.

Go to the top of the page. Back to the tutorial

SMF


Install SMF in the fastest way possible.

Fantastico has been around for many years, providing users with valuable applications to facilitate smooth operations related to web hosting. SMF is a classic example of such a helpful application. Now Fantastico is a very reputed company that has become popular worldwide.

The applications provided by the company are straightforward to use. Fantastico has a good stock of scripts, and these scripts make the installation process less time-consuming. The best part is that these applications are compatible with Cpanel. Now, if you have spent much time looking for a tutorial on installing SMF, you have certainly stumbled upon the proper tutorial.

This tutorial is just perfect for those people who are new to SMF. The tutorial will guide you through the installation period, divided into simple and systematic steps.

Now that you are reading this tutorial, it can be assumed that you already know how to use the Fantastico interface.

1. you must locate a tab that says SMF in that list. Once you find that tab, you will have to click on it.

SMF

2. After that, an installation screen will appear; on this screen, you must click on a link that says new installation.

SMF

3. Once you finish the abovementioned step, you will be directed to another screen where you must note the directory in which you want to install SMF.

SMF

4. On the same screen, you must specify a username for the admin and mention a password.

SMF

5. To start the installation procedure, click Install SMF.

SMF

6. To complete the installation of SMF, you must click on finish.

SMF

This brings us to the end of the tutorial. Now, you can take the time to look at all this application’s different features and tools. Now, you must learn the application in such a way that you absorb each aspect of the application well. So you see that if you rush the process knowing, you will miss out on a lot. As a new user, you will have some trouble figuring out the use of specific tools in the application, but once you spend a little time with the application, things will be better.

The good part about this application is that certain features can be tweaked per users’ requirements. So, if you need to change specific tools’ settings or features, you can proceed. There are various tutorials on how to use this application, and you can consult them without any problem.

Go to the top of the page. Back to the tutorial

Right Procedures to Backup Your Website in cPanel


Proper Procedures to Take Data Backup of a Website From cPanel

It is always suggested that you back up your website files before making the most significant changes. Backing up a website is a crucial part of regular accounts & any databases utilized by maintenance. In essence, the Backups region bestows a fundamental interface to download and store all or just a few of your website’s files, forwarders, filters and databases. This tool may be helpful for more skilled users who want to speed up the backup process.

In cPanel, there are 2 dissimilar methods through which you can create Data backups of your account with the help of the “”Backup Wizard””. You can create and download a single Data backup file of your whole account, which consists of all your files & databases, or you can generate & download a Data backup of these items in isolation.

One can generate a backup of his/her website very quickly. With the help of the cPanel Backups functionality, account backups can be done successfully for your hosting account. If your account is under 500MB, you can complete a Data backup version with a single mouse click. On the other hand, if the performance is enormous (more than 500MB), the complete automatic bacBackup files & databases must be backed up individually. First and foremost, you should understand the requirements of your website and decide what needs to be backed up or restored accordingly.

Steps to BacBackupwebsite in cPanel

The demonstration presented here has been done by assuming that the user has already logged in to his cPanel and is ready to learn about the website’s data backup procedures. To login to the cPanel, type your domain “”URL”” in your browser window and add “”/cpanel”” at the end of the URL.

You will be taken to the home page as soon as you log into your cPanel. You can find different sections on the home page to perform various unique operations.

1) Go to the ”Files” section and click the “”Backup Wizard”” icon. (The Backup Wizard is an intelligible interface that can generate a Data backup of the entire website, a fractional backup, or let a website restore from the previous bacBackupved. The Backup Wizard may be very helpful to new users). Immediately, you will be taken to the chief backup screen, where you can backup or restore your files in your hosting account. You will find three options in the backup screen: Backup/restore, Full or partial backup, and Download.

backup

2) In the backup screen, click on the “”Backup”” link that can be found at the bottom of the page.

cpanel backup
cpanel

3) Here, you will be provided with the only choice of backing up a part of your hosting account. However, you need to create a full backup. For this reason, click the link that says “”Full Backup””.

backup cpanel

4) As soon as you click the “”Full Back up”” link, you’ll’ be taken to the page where a complete backup can be done. Now, choose your preferred backup destination from the dropdown box. In this case, we have selected the “”Home Directory”” as our backup destination.

backup restore

5) Now, click on the “”Generate Backup”” link at the bottom of the page. Great! We have just generated a full backup to our preferred destination (in our case, the Home directory).

backup

6) Now, click the “”Go back”” button to visit the ”Full Back” page again.

cpanel backup

7) Now, to download a copy of the bacBackup on your computer, click the link below the subheading “”Backups Available for Download””.

backup

8) save this to your computer by clicking “”Save file””. Now, we have successfully created a full backup.

backup

9) Similarly, restoring your files also includes simple and straightforward procedures. To do so, go to the Home page again.

restore

10) On the home page, Click the “”Backup Wizard”” icon under the Files section again.

backup restore

11) Now, click the “”Restore”” button on the Backup Wizard page. You will be taken to the cPanel Restore Wizard page now.

restore

12) In the Restore wizard page, you will receive several restoring options such as Home directory, MySQL databases, email forwards, and files. Select a specific type of restore that you wish to do. In our case, we are choosing to restore to the Home Directory.

cpanel restore

13) To click the browse button and the home directory Data backup, click the browse button.

cpanel restore
backup

14) After locating the home directory Data backup, click the ”Upload” button.

restore

That’s’ it!! Your files have now been successfully restored!

Now, you know the proper methods to generate a Data backup with the help of cPanel and to restore files from a backup.