Post-Nuke


How to install Post-Nuke

For those unfamiliar with Post-Nuke, well, it is a beautiful application with many different features and tools that let you do many things. Now, this application is provided by Fantastico, a highly reliable web hosting service provider. Fantastico has been operating for a long time now and provides users with applications that are easy to install and use.

All the applications are highly compatible with CPanel. Fantastico has a good stock of scripts that will let you install any application without problems. Now, in the past, people have complained, saying that they have not been able to install Post-Nuke; that is simply because they have not followed the installation process correctly. For those of you who want to install this application on your computer, this tutorial is just for you.

Below are a series of steps you can follow to install Post-Nuke on your computer.

1. When going through the Fantastico interface, you will notice a tab called Post-Nuke.

post-nuke

2. Once you locate this tab, click on it.

post-nuke

3. After you have clicked on the tab, you will be taken to an installation screen where you have to click on a new installation link.

post-nuke

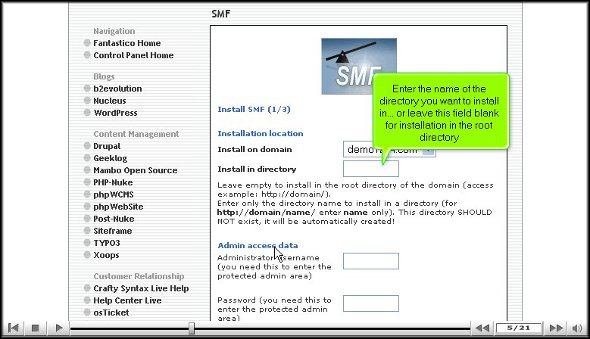
4. After you have finished the above step, you will be taken to yet another screen. You must mention the directory where you want to install the application on this screen. You also have the choice of installing the application in the root directory.

post-nuke

5. On the same screen, you must provide a username for the admin and password.

post-nuke

6. To begin the installation, you need to click on Install Post-Nuke.

post-nuke

7. To finish the installation process, click on finish.

post-nuke

That brings us to the end of the tutorial on how to install Post-Nuke. If you have followed the steps mentioned above very carefully, you have successfully installed the application. You can now review the application interface and check the various tools and features. You can do plenty with this application, so spend time learning how to use it. Do not rush the learning process, as you may miss out on some of the most critical aspects of the application.

As a new user, you may have some difficulties using the application, but it is best to keep a cool head and stay relaxed, as things will eventually go your way once you get accustomed to it.

Once you are confident about the application, you can begin configuring the features per your requirements. Post-Nuke is indeed a handy application. So, to get the best out of the application, you must install it properly. Take the time and go through all the steps mentioned in the tutorial, and you will have no trouble installing this fantastic application.

Go to the top of the page. Back to tutorial
Select the best Web Hosting Provider.

Siteframe


The installation process of Siteframe

Siteframe is another beautiful application that Fantastico provides to its users. Now, fantastico is a service provider that gives people reliable services in terms of web hosting. For years, this company has provided users with valuable applications such as Siteframe and many others.

The good part about the applications provided by Fantastico is that most of them are very user-friendly and easy to install. These applications are also compatible with cPanel. Fantastico also gives you access to a script library so you can install the applications quickly. This tutorial will teach you how to install Siteframe on your computer without much trouble. All you need to do is follow some simple steps listed below.

The steps for installing Siteframe on your computer. Since you are going through the tutorial, it can be assumed that you have a lot of knowledge of Fantastico.

1. To kick-start, locate the Siteframe tab and click on it. Once you click on the account, you will be taken to another screen, the installation screen for Siteframe.

siteframe

2. On the installation screen, click on a new linkInstallation.

siteframe

3. After you click on the new installation, you will be directed to another screen where you have to provide a name for a directory in which you want the application installed.

siteframe

4. On the very same screen, you must provide a username for the admin and a strong password.

siteframe

5. To begin the installation process, you will have to click on Install Siteframe.

siteframe

6. To confirm the installation process is complete, click on finish.

siteframe

This is the end of the tutorial on how you can install Siteframe. Once you are sure that you have installed the application correctly on the computer, you can then start looking at the application’s interface. This application has very advanced features and helpful tools, so there is a lot that you can achieve with it. However, rushing through the entire learning process is not advisable, as you can miss out on some fundamental aspects of the application.

In the beginning, you will face some difficulty using the application; however, once you start spending some time with the application, you will be able to work things out in the long run. You can consult other tutorials to understand how to use the application and its tools.

Once you start using this application, you will realize you have greatly benefited. The application also supports certain E-commerce features, which are added benefits. So, to get the best out of the application, you must install it properly, and to do that, you must follow the steps mentioned in the tutorial very carefully. Siteframe is indeed an excellent application.

Go to the top of the page. Back to the tutorial

SMF


Install SMF in the fastest way possible.

Fantastico has been around for many years, providing users with valuable applications to facilitate smooth operations related to web hosting. SMF is a classic example of such a helpful application. Now Fantastico is a very reputed company that has become popular worldwide.

The applications provided by the company are straightforward to use. Fantastico has a good stock of scripts, and these scripts make the installation process less time-consuming. The best part is that these applications are compatible with Cpanel. Now, if you have spent much time looking for a tutorial on installing SMF, you have certainly stumbled upon the proper tutorial.

This tutorial is just perfect for those people who are new to SMF. The tutorial will guide you through the installation period, divided into simple and systematic steps.

Now that you are reading this tutorial, it can be assumed that you already know how to use the Fantastico interface.

1. you must locate a tab that says SMF in that list. Once you find that tab, you will have to click on it.

SMF

2. After that, an installation screen will appear; on this screen, you must click on a link that says new installation.

SMF

3. Once you finish the abovementioned step, you will be directed to another screen where you must note the directory in which you want to install SMF.

SMF

4. On the same screen, you must specify a username for the admin and mention a password.

SMF

5. To start the installation procedure, click Install SMF.

SMF

6. To complete the installation of SMF, you must click on finish.

SMF

This brings us to the end of the tutorial. Now, you can take the time to look at all this application’s different features and tools. Now, you must learn the application in such a way that you absorb each aspect of the application well. So you see that if you rush the process knowing, you will miss out on a lot. As a new user, you will have some trouble figuring out the use of specific tools in the application, but once you spend a little time with the application, things will be better.

The good part about this application is that certain features can be tweaked per users’ requirements. So, if you need to change specific tools’ settings or features, you can proceed. There are various tutorials on how to use this application, and you can consult them without any problem.

Go to the top of the page. Back to the tutorial

How To Install SohoLaunch


How to install SohoLaunch

You may have been looking for a tutorial that teaches you how to install an excellent application like Soholaunch. This application is provided by none other than the famous company Fantastico. Fantastico is a company that has been around for many years and has been providing reliable web hosting services to users worldwide. The best part is that the applications provided by Fantastico are not only easy to install but are very easy to use and deal with and are compatible with cPanel. Fantastico provides scripts that will allow you to install the applications within a very short period. Soholaunch is an application with handy features and sophisticated tools that let you do many things.

However, with this tutorial, you will learn to install Soholaunch through a systematic process broken down into a few steps.

1. So when you are going through the interface of Fantastico, you will notice a tab that says Pro Edition in the left-hand corner of the screen. You will need to click on it.

soholaunch

2. After you click on the tab, you will be taken to another screen, the installation screen. On this screen, you must click a link that says new installation.

soholaunch

3. On the very same screen, you will also have to provide a name for the admin and a password.

soholaunch

4. To begin the installation process, click Install Soholaunch.

soholaunch

5. To complete the installation process, you must click on finish.

soholaunch

So, with that, we come to the end of the tutorial. So, if you have followed the above steps well, Soholaunch has been installed on your computer without any problems. Once you have installed the application, you can review its interface and check the features individually. This application has various tools that do different things. To learn more about the usage of the application, you must take your time to go through it and understand more about it; in fact, you can even go through other tutorials to learn about the tools. However, it would be best if you did not rush through the learning process as there are many essential aspects that you might miss out on. If you are a new user, you may find it initially challenging to adjust to the application, but you will get used to it over time. So, have a little patience and keep calm while using this application.

Once you start using this application, you will gradually understand its benefits. You will also see that you can configure the settings as per your requirements. Follow the tips in the tutorial, and you will have no problems.

Go to the top of the page. Back to the tutorial

Someone’s Using Your Network: Quick Fixes


Someone’s Using Your Network: Quick Fixes

We all know that securing a network is really important. Whether at home or at work, any network you use should be entirely secure inside and out. But, sometimes, no matter what we try to do, networks can become compromised. This becomes a really big deal when the person using your network is doing something illegal – it could be traced back to you.

network

PHP Support ticket


The easiest way to install a PHP Support ticket

To install the PHP Support ticket properly, you need an excellent tutorial. If you are reading this, the good news is that this tutorial will guide you through installing a PHP Support ticket.

The PHP Support ticket is a handy application by a reputed web hosting service provider called Fantastico. Fantastico has been around for many years and provides very reliable services to users. All the applications provided by Fantastico are pretty easy to use and are equally easy to download.

As a user, you will have access to scripts provided by Fantastic, which will help you install this application within a few minutes. The applications provided by Fantastico are very user-friendly and can be used even by a non-technical person. These applications can be used with Cpanel.

Let us get straight into the tutorial on installing an excellent application like the PHP Support ticket on your ticket.

1. You must start by clicking on the tab that says PHP Support ticket on the left-hand side of the Fantastico interface.

php support ticket

2. Once you click on this tab, an installation screen will appear, and you will find a new installation link. You will need to click on this link.

php support ticket

3. Then, you will be taken to a page where you must mention the directory name in which you want the PHP Support ticket installed.

php support ticket

4. you must also type in the administrator’s name and password on the same page.

php support ticket

5. On the same page, right at the bottom, you will notice a tab that says install PHP Support ticket. To initiate the installation, you must click on it.

php support ticket

6. To complete the procedure, you must click on finish.

php support ticket

This brings us to the end of the installing a PHP Support ticket tutorial. If you have successfully followed the steps mentioned above, you have installed the application properly.

After the installation, the next step would be to review all the application features and familiarise yourself with their respective uses. Since there is a lot to learn, you must not rush through the learning process; instead, take your time and ensure you understand everything nicely. If you run through the learning process, there are a lot of essential aspects of the application that you may miss out on.

Getting used to the application may take some time, but when you learn how to use the tools, things will be much easier for you in the long run. This application has tons of features that you can use to your advantage. To get the best out of the PHP Support ticket, follow the tips mentioned in this tutorial.

Go to the top of the page. Back to the tutorial

PHProjekt


The perfect procedure to install PHProjekt

Applications from Fantastico are not difficult to handle or install, provided you follow proper guidelines from a good tutorial. Now, if you are looking for an excellent tutorial to teach you to install PHProjekt, you have found the appropriate tutorial. This tutorial will help you get through the installation process without any problems.

Now, for those who may not be familiar with Fantastico, here is an introduction: Fantastico is a top-rated web hosting provider that has been operating for many years. All the applications that Fantastico provides to the users are straightforward to use and install, and in fact, they are very compatible with Cpanel. Fantastico gives you many scripts, ensuring the application’s successful installation on your computer within a very short period.

Let us go into the tutorial and go step by step through installing PHProjekt on your computer.

1. To kickstart the installation, locate a tab that says PHProjekt and click on it immediately.

PHProjekt

2. After that, you will be taken to an installation screen where you have to click on the new installation.

phprojekt

3. You must provide the name of the directory you want to work in.

phprojekt

4. The next screen will ask you to provide a name for the administrator, and you need to provide a password for it.

phprojekt

5. On the same screen right at the bottom, you will notice a tab that says install PHProjekt. You have to click on it

phprojekt

6. To complete the installation procedure, click on finish.

phprojekt

So, with that, we come to the end of the tutorial on how to install PHProjekt. After you are sure that you have been able to install the application correctly, you should initialize the application and start going over the various tools and features. You can do plenty with the tools of this application, so you should take your time and go through them. Do not rush through the learning process; you may miss certain essential aspects. Sometimes, you may feel slightly irritated while using the application, but then you should keep a cool head and continue learning to use the features.

Once you feel comfortable using PHProjekt, you can start tweaking certain application features. The good part about this application is that you can change the settings of specific components for your requirements. This application also has certain features that support eCommerce. Once you use this application, you will notice a substantial improvement in your business operations. So, to get the best out of PHProjekt, you will need to install the application properly. So, you must follow the steps mentioned in the tutorial very closely to get the process right.

Go to the top of the page. Back to the tutorial

PHPNuke


The best way to install PHPNuke

Off late, if you have been experiencing a problem while trying to install PHPNuke on your computer, that is probably because you are not following a proper tutorial. Well, now you do not have to worry; this tutorial is designed to guide you through the installation process. PHPNuke is an ideal application that almost everyone would love on their computer. This application comes with a wide range of tools and features. This application is provided by the reputed web hosting service provider Fantastico.

Fantastico is a company that has been around for quite some time. This company is known to provide some of the best applications ever. The applications from Fantastico are not complicated to use. They all have very user-friendly interfaces. To install these applications successfully, you will have access to specific scripts that will make the job easier and less time-consuming.

Let us get straight to the tutorial on how you can install PHPNuke. The tutorial has been broken down into a few steps mentioned below.

1. When going through the Fantastico interface, you will come across a tab that will say PHPNuke. You must click on this tab immediately to go to the next screen.

phpnuke

2. The next screen is the installation screen; on this screen, you will find a link that says new installation.

phpnuke

3. On the next page, providing the directory name where you want the application installed is compulsory.

phpnuke

4. On the same page, you must type a suitable name for the administrator and a password to go with it.

phpnuke

5. Right at the bottom of the page, you will find a tab that says install PHPNuke, and you need to click on it.

phpnuke

6. To complete the PHPNuke installation, you must click on finish.

phpnuke

Well, that is the end of the tutorial, and if you have been able to go through the steps mentioned above, you have successfully installed PHPNuke. After installing the application correctly on your computer, you should spend a little time learning about the various features and tools provided in the application. There are many things for you to know, so you should not rush the entire learning process, as you may miss out on some crucial aspects.

If you are a new user, you may feel the application is complicated, and it is perfectly fine to feel that way. However, with a bit of patience, you can overcome this frustration.

Now that you know all the functions of the various tools in the application, you should begin configuring the application’s settings for your suitable purpose. Once you start using this application, you will gradually realize that you have benefited in the long run.

Go to the top of the page. Back to the tutorial

Dew-NewPHPLinks


The process to install Dew-NewPHPLinks

Many have complained that they cannot install Dew-NewPHPLinks properly on their computers. This is because they have not been following a proper tutorial. However, the good news is that this tutorial will guide you through a series of manageable steps by which you can successfully install Dew-NewPHPLinks on your computer. Here is a little introduction to Dew-NewPHPLinks in case some of you have never heard of it; this is a beautiful application from Fantastico, a very reliable web hosting service provider. All the applications that are provided by Fantastico are incredibly user-friendly. These applications can be installed on the user’s computer using the scripts provided by Fantastico. These scripts help to save a lot of time during the installation period.

Well, let us get straight into installing it on your computer.

1. To start, you must find a tab that says Dew-NewPHPLinks and click on it.

Dew-NewPHPLinks

2. After you have clicked on it, an installation screen will come up; on that screen, you will have to look for a tab that says new installation. You will have to click on that as well.

Dew-NewPHPLinks

3. On the next page, you must supply the name of the directory you want the application installed.

Dew-NewPHPLinks

4. On the same page, you will be asked to fill in a name for the administrator and a password.

Dew-NewPHPLinks

5. At the bottom of the screen, you will notice a tab that says install Dew-NewPHPLinks. Once you have completed the above steps, click on this link.

Dew-NewPHPLinks

6. To complete the process, you must click on finish.

Dew-NewPHPLinks

With this, we have ended the tutorial, and you have successfully installed the application on your computer. To install the application successfully, you must carefully follow the abovementioned tips. After the installation, you should start looking around and checking out the application’s functions. Dew-NewPHPLinks has beautiful tools that let you do many things. So it is advisable to spend a little time learning how to use the tools’ usage. Do not rush through the learning process because you may miss many essential aspects. You may have difficulty going about the application as a first-time user but do not feel disheartened or get worked up about it. You simply need a certain amount of patience, and things will work out in the end. You can consult other tutorials to help you understand how to use this application.

Now that you feel comfortable learning about Dew-NewPHPLinks, you can start configuring the settings to suit your purpose. This application is handy, so if you install itn your computer, you will benefit fr the long run.

Go to the top of the page. Back to the tutorial

PHPList


How to install PHPList

Installing PHPList on your computer is not a big deal, provided you follow the guidelines of a well-written Tutorial. If you are contemplating installing this fantastic application on your computer, this is the proper tutorial you are reading. If you consult this tutorial, you can install PHPList on your computer without problems.

PHPList is an application provided by a reliable web hosting service provider named Fantastico. Fantastico has been around for many years, providing users with beautiful applications like PHPList. The best part about the applications provided by Fantastico is that they are very user-friendly and have sophisticated tools that give excellent results. You can use these applications in conjunction with Cpanel. Fantastico has an extensive stock of scripts; you can use those scripts to install the applications. In fact, you save a lot of time in using these scripts.

The steps to install PHPList on your computer are listed below.

1. When exploring the interface of Fantastic, you will have to locate a tab that says PHPList. Once you identify this tab, you must click on it right away.

phpList

2. After doing the above activities, you will be taken to an installation screen where you have to click on a link that says new installation.

phpList

3. Again, you will be directed to yet another page. On this page, you must type the directory name in which the application will be installed. You can also let PHPList install automatically within the root directory.

phpList

4. On the very same screen, you will have to provide a name for the administrator and a password.

phplist

5. On the bottom end of the page, you will find a tab that says install PHPList. You will need to click on that only after you have completed the above steps without fumbling.

phpList

6. To wrap up the installation process, click finish.

phplist

Well, by now, you must have understood that the installation process of PHPList is not challenging. You simply need to follow the steps mentioned in the tutorial word for word, and you will not face any problems. Now that you are sure that the application has been installed correctly, it’s time you look around and check out the features and the various tools of this application. You will have to spend a little time learning how to use the multiple parts to get the best out of the application, so you shouldn’t rush through the learning process.

You will face a lot of trouble when you try to use this application, especially if you are a new user, but you should not get too worked up about it. Try to have a calm and composed approach towards the application; things will work out fine eventually.

Go to the top of the page. Back to the tutorial